Elevate your yard’s potential by creating a sturdy foundation for that dream shed you’ve been envisioning. A Concrete Shed Slab in Cowards may feel tough at first, yet it is a rewarding project that adds value and function.
Whether you want a workshop, a garden retreat, or a place for tools, a solid base matters. In Cowarts, focus on the climate and the right materials, like fiber mesh and a moisture barrier, for lasting strength.
Understanding the Local Climate in Cowarts
Knowing the weather helps you plan a stronger Concrete Shed Slab in Cowards. Summers are warm and humid, and heavy showers can happen fast. Winters are mild, yet wet days can still slow curing.
Because humidity can slow drying, protect fresh concrete from rain. Also, aim for steady temperatures so the slab cures evenly and stays durable through each season.
Selecting the Right Materials for Your Concrete Shed Slab
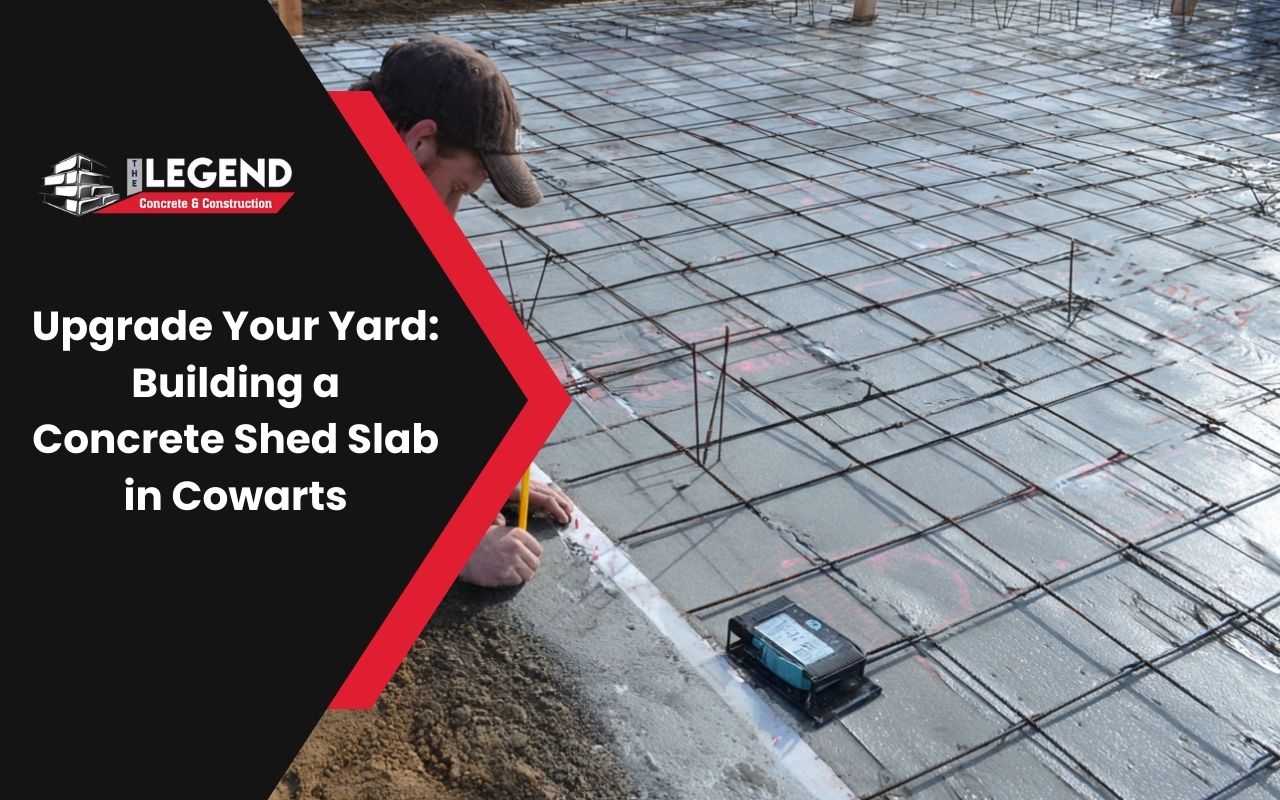
Quality supplies help your slab last longer. Start with a concrete mix that fits your shed needs, often four to six inches thick. Then, add fiber mesh to help reduce cracks as the ground shifts.
Next, place a moisture barrier under the slab to block dampness. Finally, choose strong anchors to keep the shed stable in storms and daily use.
- Concrete mix for outdoor slabs
- Fiber mesh for crack control
- Moisture barrier to block ground moisture
- Anchors for a secure shed base
- Form boards, stakes, and a level
Preparing the Groundwork for the Foundation
Clear and level the site so the base stays flat. Remove grass, rocks, and topsoil until you reach firm soil. Then, dig about six inches so you have room for a gravel layer and the slab.
After that, add two to three inches of compactable gravel and tamp it well. This improves drainage, so water does not sit under the Concrete Shed Slab in Cowards.
- Remove loose topsoil and debris
- Dig to the right depth for gravel and concrete
- Add gravel and compact it evenly
- Check slope so water drains away
Calculating the Dimensions and Layout of the Shed Slab
Measure your shed footprint with care to avoid later issues. Add at least two inches on each side to make room for form boards. Then, sketch the layout so you can follow it during setup.
Set stakes at each corner and run string lines around them. Use a carpenter’s square to confirm corners are true, since clean lines help the pour go smoothly.
Mixing and Pouring the Concrete
Choose a mix made for outdoor slabs and follow the water ratio closely. If the mix is too wet, it weakens the slab. If it is too dry, it can be hard to spread and finish well.
Pour into forms from the far corner and work back toward your exit. Spread concrete into corners, level it with a straight board, and smooth the top with a bull float.
Ensuring Proper Curing and Drying Times
Moisture control is vital right after the pour. Cover the slab with damp burlap or plastic to slow evaporation, and shade it if the sun is intense. This helps hydration, which boosts strength.
Give at least seven days for early curing, and longer in cooler conditions. Also, wait about two weeks before placing heavy loads, since patience helps prevent cracks.
Adding Finishing Touches for Durability and Aesthetics
Once the slab cures, remove the forms and smooth rough edges. Then, cut control joints every four to six feet, because they guide small cracks into clean lines as temperatures change.
When the surface is fully dry, apply a sealer to guard against stains and moisture. If you want more grip, a broom finish can help while keeping the slab attractive.
- Smooth edges after removing forms
- Cut control joints for cleaner cracking
- Apply sealer to protect the surface
- Consider a broom finish for traction
Securing the Shed to the Concrete Slab
Set the shed frame on the slab and mark anchor points. Drill holes with a hammer drill, and clean dust out so anchors grip well. Then, insert wedge or sleeve anchors and tighten them firmly.
As you work around the perimeter, keep checking that the shed is level. With proper anchors, the Concrete Shed Slab in Cowards supports a stable shed in high winds.
Maintaining and Protecting Your Concrete Shed Slab
Keep the slab clean by sweeping or rinsing it often. Reapply sealer every two to three years to keep moisture and stains out. Also, fill small cracks early so they do not spread.
To reduce water problems, keep gutters clear and make sure drainage moves away from the slab. For more local project help, explore construction services in Houston County and construction services in Dothan, AL.
Frequently Asked Questions
How thick should a shed slab be in Cowarts?
Most sheds do well with a slab that is four to six inches thick. However, heavier sheds may need more depth and added support.
Do I really need fiber mesh for this project?
Fiber mesh helps reduce cracking and improves slab strength. So, it is a smart upgrade for a Concrete Shed Slab in Cowards.
What does a moisture barrier do under concrete?
A moisture barrier blocks ground moisture from rising into the slab. As a result, your shed floor stays drier over time.
When should I install anchors for the shed?
You can set anchors in wet concrete or drill them after curing. Either way, proper placement and tight fastening matter.
How long should I wait before placing a shed on the slab?
Wait at least two weeks before adding heavy loads. While full strength takes longer, early patience helps avoid damage.
Enjoying the Benefits of Your Sturdy and Functional Yard Addition
By following these steps, you create a base that stands up to Cowarts weather. From fiber mesh to a moisture barrier and reliable anchors, each choice supports long-term stability.
If you want a pro finish or help with site prep, reach out through the contact page to discuss your Concrete Shed Slab in Cowards and the best next steps.